Development Setup: Windows
So you want to be a dRonin?
This page describes the procedures for setting up a Windows machine to compile dRonin firmware and GCS software. (More details on this are at Tracking Development with Git)
Make sure you're using the correct version of these docs!
This documentation is for building the particular release in question. Most of the time, it's preferable to build from the development branch. If the version at the top of the page does not read v99-dev, please select that version before continuing,
1. Set up prerequisites for the build environment
Download Required Programs
Git 2.6.4 or later - The latest release should be fine.
Python 2.7.x - Get the latest Python 2.7.x Anaconda distribution from https://www.continuum.io/downloads
Qt 5.6.1 (online installer) - http://download.qt.io/official_releases/online_installers/qt-unified-windows-x86-online.exe. Please do not install a newer release, as it will not work. Qt provides much of the GUI framework behind GCS. Also, the compiler and some necessary Unix command line tools are provided.
Microsoft Visual Studio 2015 Community Edition - https://www.visualstudio.com/en-us/products/visual-studio-community-vs.aspx. Do not install an older or newer release, as it will not work. MSVC is used to compile GCS on Windows.
Install Required Programs
Default Install Paths
The bash_profile used by dRonin is setup to use default install paths. Please keep default paths while installing tools unless you are prepared to edit the bash profile by hand. Read the following steps carefully to avoid problems.
- Install git. Default options are okay. You will use this to clone the dRonin repository to your machine. It also provides a bash shell and other Unix-like tools.
- Install Python 2.7.x Anaconda distribution. Default options are okay. Python is used at various stages in the build process for both GCS and firmware.
- Install Qt SDK.
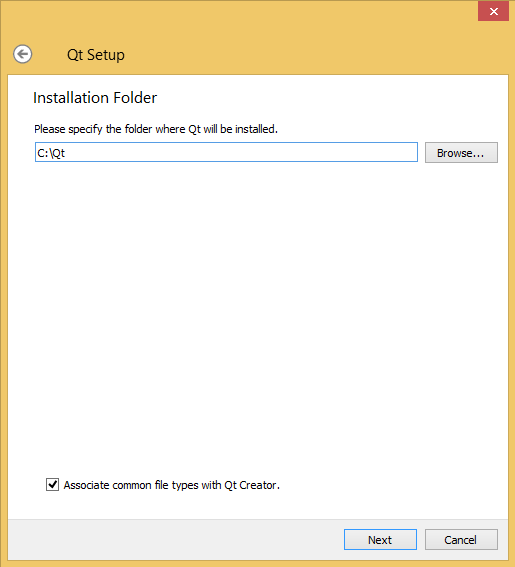
Step 1. Skip account login etc.
Step 2. Use default installation folder.
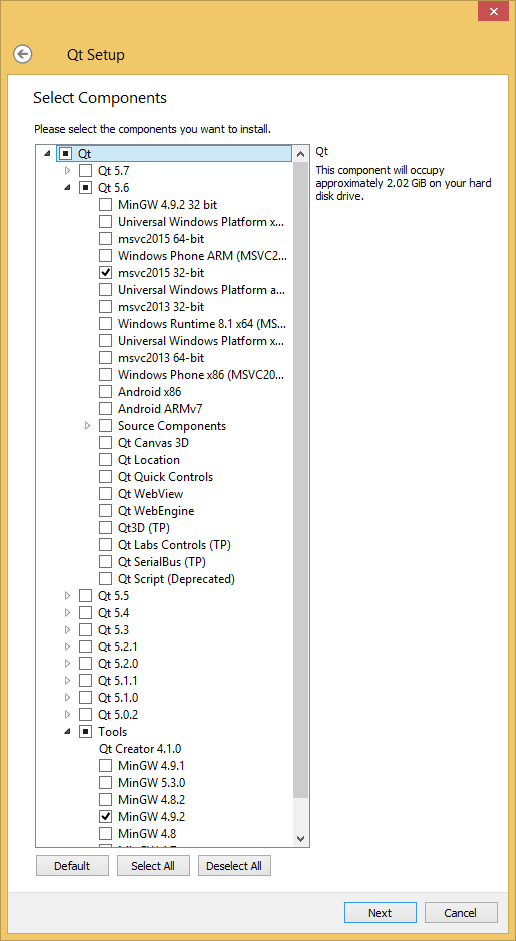
Step 3. Deselect Qt / Qt 5.7 and anything else that is selected by default (optional).
Step 4. Expand and select Qt / Qt 5.6 / msvc2015 32-bit.
Step 5. Expand and select Tools / MinGW 4.9.2.
Step 6. Accept license and shortcuts.
- Install Visual Studio.
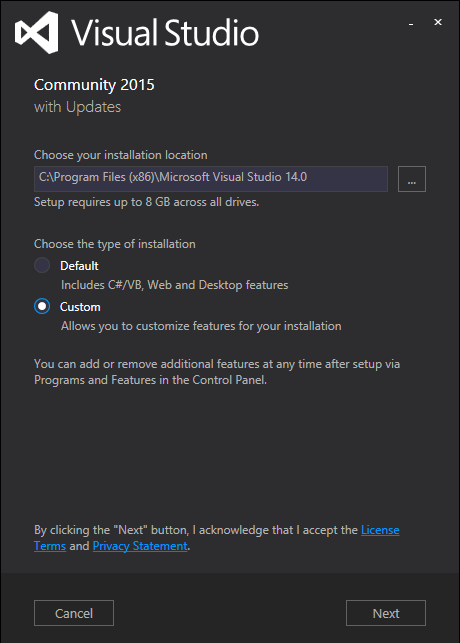
Step 1. Leave default install location, choose "Custom" installation type.
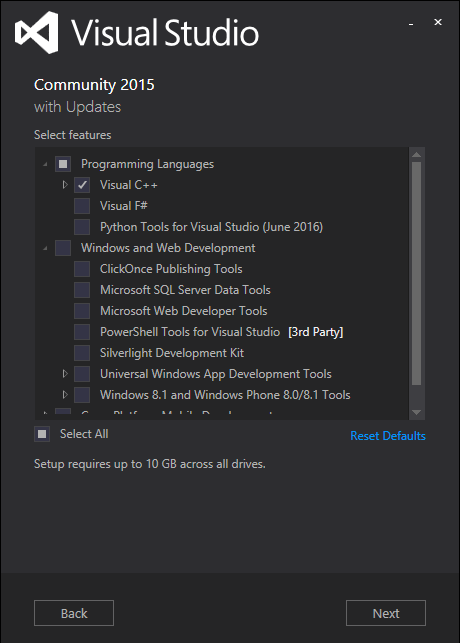
Step 2. Unselect default features (optional), expand "Programming Languages" and select "Visual C++".
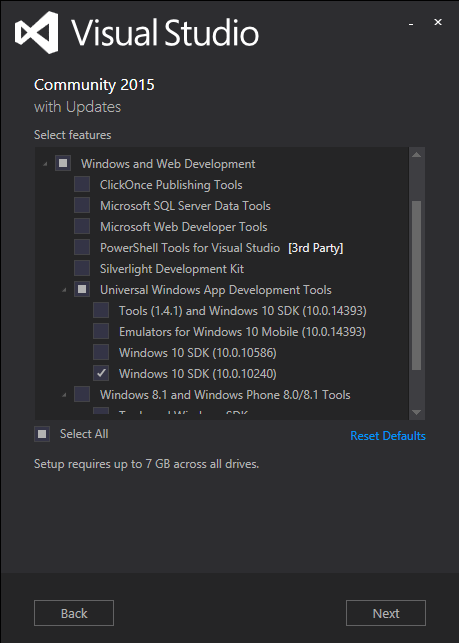
Step 3. Expand "Windows and Web Development", then "Universal Windows App Development Tools". Select "Windows 10 SDK (10.0.10240)" (PLEASE MAKE SURE YOU GET THIS EXACT VERSION).
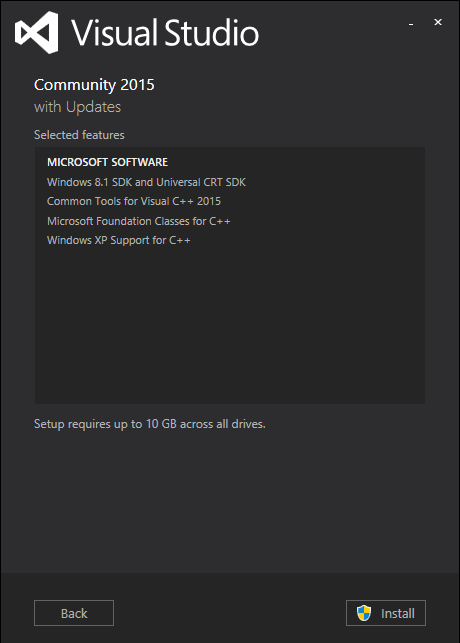
Step 4. Install/accept UAC prompt.
2. Checkout the dRonin repository and build
Clone the source code repository
Start a shell using the "Git bash" program shortcut.
Next, clone the dRonin repository. If you have your own fork, specify its URL on the git command line instead of the default URL below:
git clone git://github.com/d-ronin/dRonin.git
cd dRonin
Type these command to install a bash_profile suitable for developing the project:
cp make/winx86/bash_profile ~/.bash_profile
chmod 755 ~/.bash_profile
You may have to edit bash_profile if you have changed any installation paths from the default. Then exit from the terminal using the command below. Once the terminal has closed, start a new "Git bash" instance.
exit
Automatic download and install of required programs
The dRonin build environment is capable of installing the rest of the tools that it needs.
Next change to the dRonin source directory, install the ARM SDK tools, openssl development libraries, and the zip compression tools used in packaging with the following commands.
cd dronin
make arm_sdk_install
make openssl_install
make zip_install
If you wish to build packages for distribution (not recommended unless you know what you're doing), you will also need to install breakpad.
make breakpad_install
3. Build the software
After this you can compile everything with the following commad!
make all
4. Run GCS
You can run GCS from the command line after a successful build by typing:
./build/ground/gcs/bin/drgcs
Updated less than a minute ago
