Using Naze32
Unfortunately, the Naze32 takes a little more work to get running.
This documentation is superseded. dRonin Documentation is now on http://dronin.org/docs/
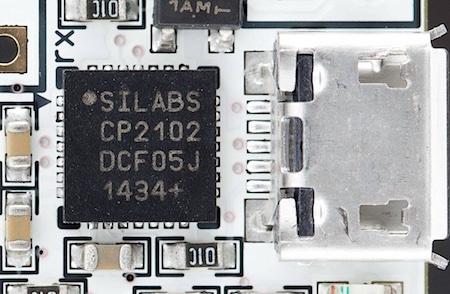
The Naze32 is a bit different from most of the flight controllers supported by dRonin. Unfortunately, Naze32 does not connect USB directly to the microcontroller; instead it has a USB-to-serial converter IC between the USB port and the processor.
There are many variants of Naze32
There have been many official versions of Naze32 made, and there are also many clones. As a result, pictures and instructions in this documentation may not exactly correspond to your flight controller.

In this case, a CP2102 is used for USB connectivity.
Unfortunately, this means that the dRonin bootloader cannot be used to install dRonin, nor can the dRonin auto-upgrade service be used.
Installing the firmware on Naze32
Currently, the easiest path to flashing dRonin on Naze32 is to use CleanFlight Configurator. First, install dRonin GCS and CleanFlight Configurator on your computer.
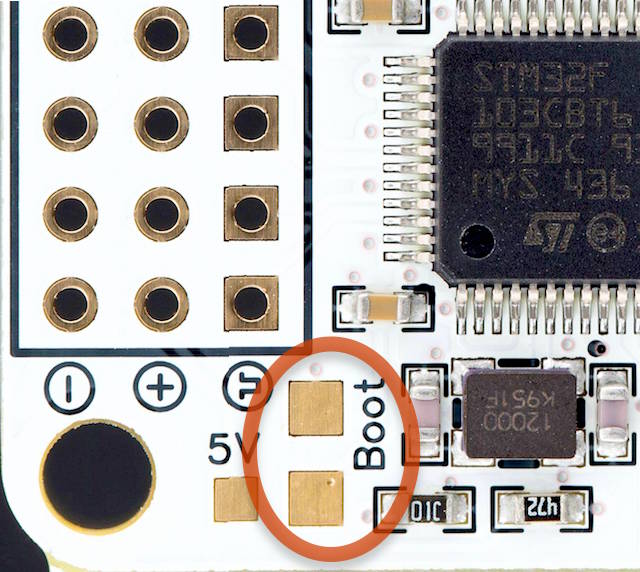
Next, locate the boot pads on your Naze32. Consult your flight controller's documentation for details on where they can be found.

Boot pads on a Naze32 Rev5
By default, the Naze32 will try and start any software that is installed on it. By connecting the boot pads together before (and while) power is applied, the flight controller will be instructed to enter a mode where firmware can be programmed. Short the pads together with something metallic and conductive. Preferably, use something sharp like a fine pair of tweezers. Then, while the boot pads are shorted, connect the flight controller to USB.
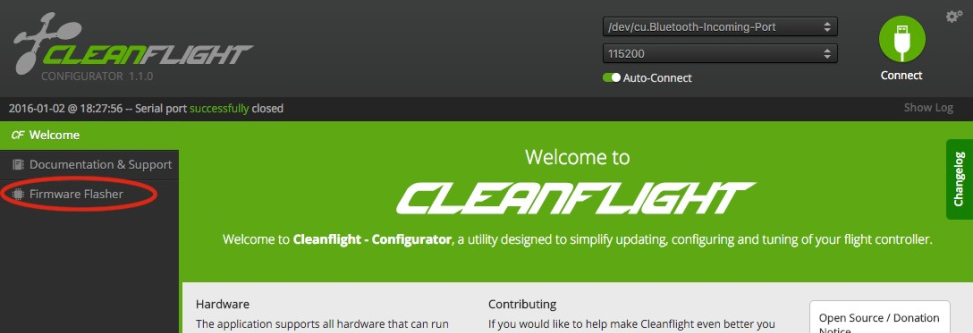
Start CleanFlight Configurator. Select the USB COM port that is connected to the Naze32 in the upper right corner, and then click "Firmware Flasher" on the left.

On the firmware flasher screen, ensure "Full Chip Erase" and "No reboot sequence" are checked. Then click "Load Firmware (Local)" and select the ef_naze32.hex file that came with dRonin. Then click "Flash Firmware".
Then, it should be possible to exit CleanFlight configurator, start dRonin GCS, and connect to the Naze32. To do so, you must select the serial port associated with it in the drop down in the lower right corner of GCS, and then click 'Connect'.
BaseFlight / CleanFlight motor ordering conventions
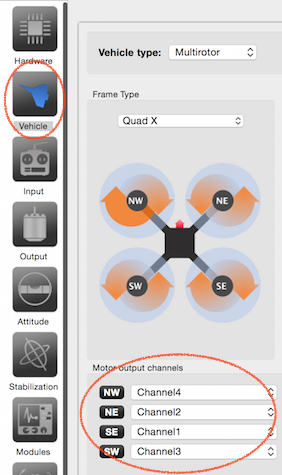
CleanFlight and dRonin use different motor mapping conventions. CleanFlight motor mappings are based on some very old Multiwii hardware; the ordering is therefore somewhat unusual. Fortunately, it's easy to remap motors on the vehicle config pane in the GCS.

The motor output channels section on the vehicle config pane is where motors are assigned to channels.
To ease conversion you can assign the motors in GCS per the below table and keep your existing wiring.
| Quad-X | Quad-P | Tricopter |
|---|---|---|
| NW: Channel 4 | N: Channel 4 | NW: Channel 3 |
| NE: Channel 2 | E: Channel 2 | NE: Channel 2 |
| SE: Channel 1 | S: Channel 1 | S: Channel 1 |
| SW: Channel 3 | W: Channel 3 |
Using MSP on-screen displays like OSDoge
It's recommended that you use MWOSD. MWOSD is an on-screen display that runs on multiple types of hardware, including MiniMOSD, Micro-MiniMOSD, and OSDoge.
MWOSD speaks a protocol called Multiwii Serial Protocol (MSP), that dRonin also supports. MSP was introduced by MultiWii and is also used by Baseflight and Cleanflight.
It is recommended you first install the latest MWOSD on the on-screen display hardware as documented here.
Unfortunately, the Naze32 has only two serial ports available to end-users. One is very commonly used for radio control, leaving the other to be shared between the USB serial used for configuration and flashing. However, dRonin is able to autodetect whether it is connected to GCS when set for 'MSP' and to choose between speaking the configuration protocol or MSP telemetry.
Therefore, it is recommended you wire the OSD to 'MainPort' (the center pins on Naze32). Then, set the configuration for MainPort on the hardware settings pane to 'MSP' and reset the flight controller.
Note that you must disconnect the OSD to use USB/GCS; or if you're using OSDoge, flip the switches towards the USB port to enable use of the USB for configuration.
Updated less than a minute ago
